Well I hope this helps someone, because this whole episode has been doing my head in!
However, there is light at the end of the tunnel, and it turns out all my problems could be down to one loose screw . . .
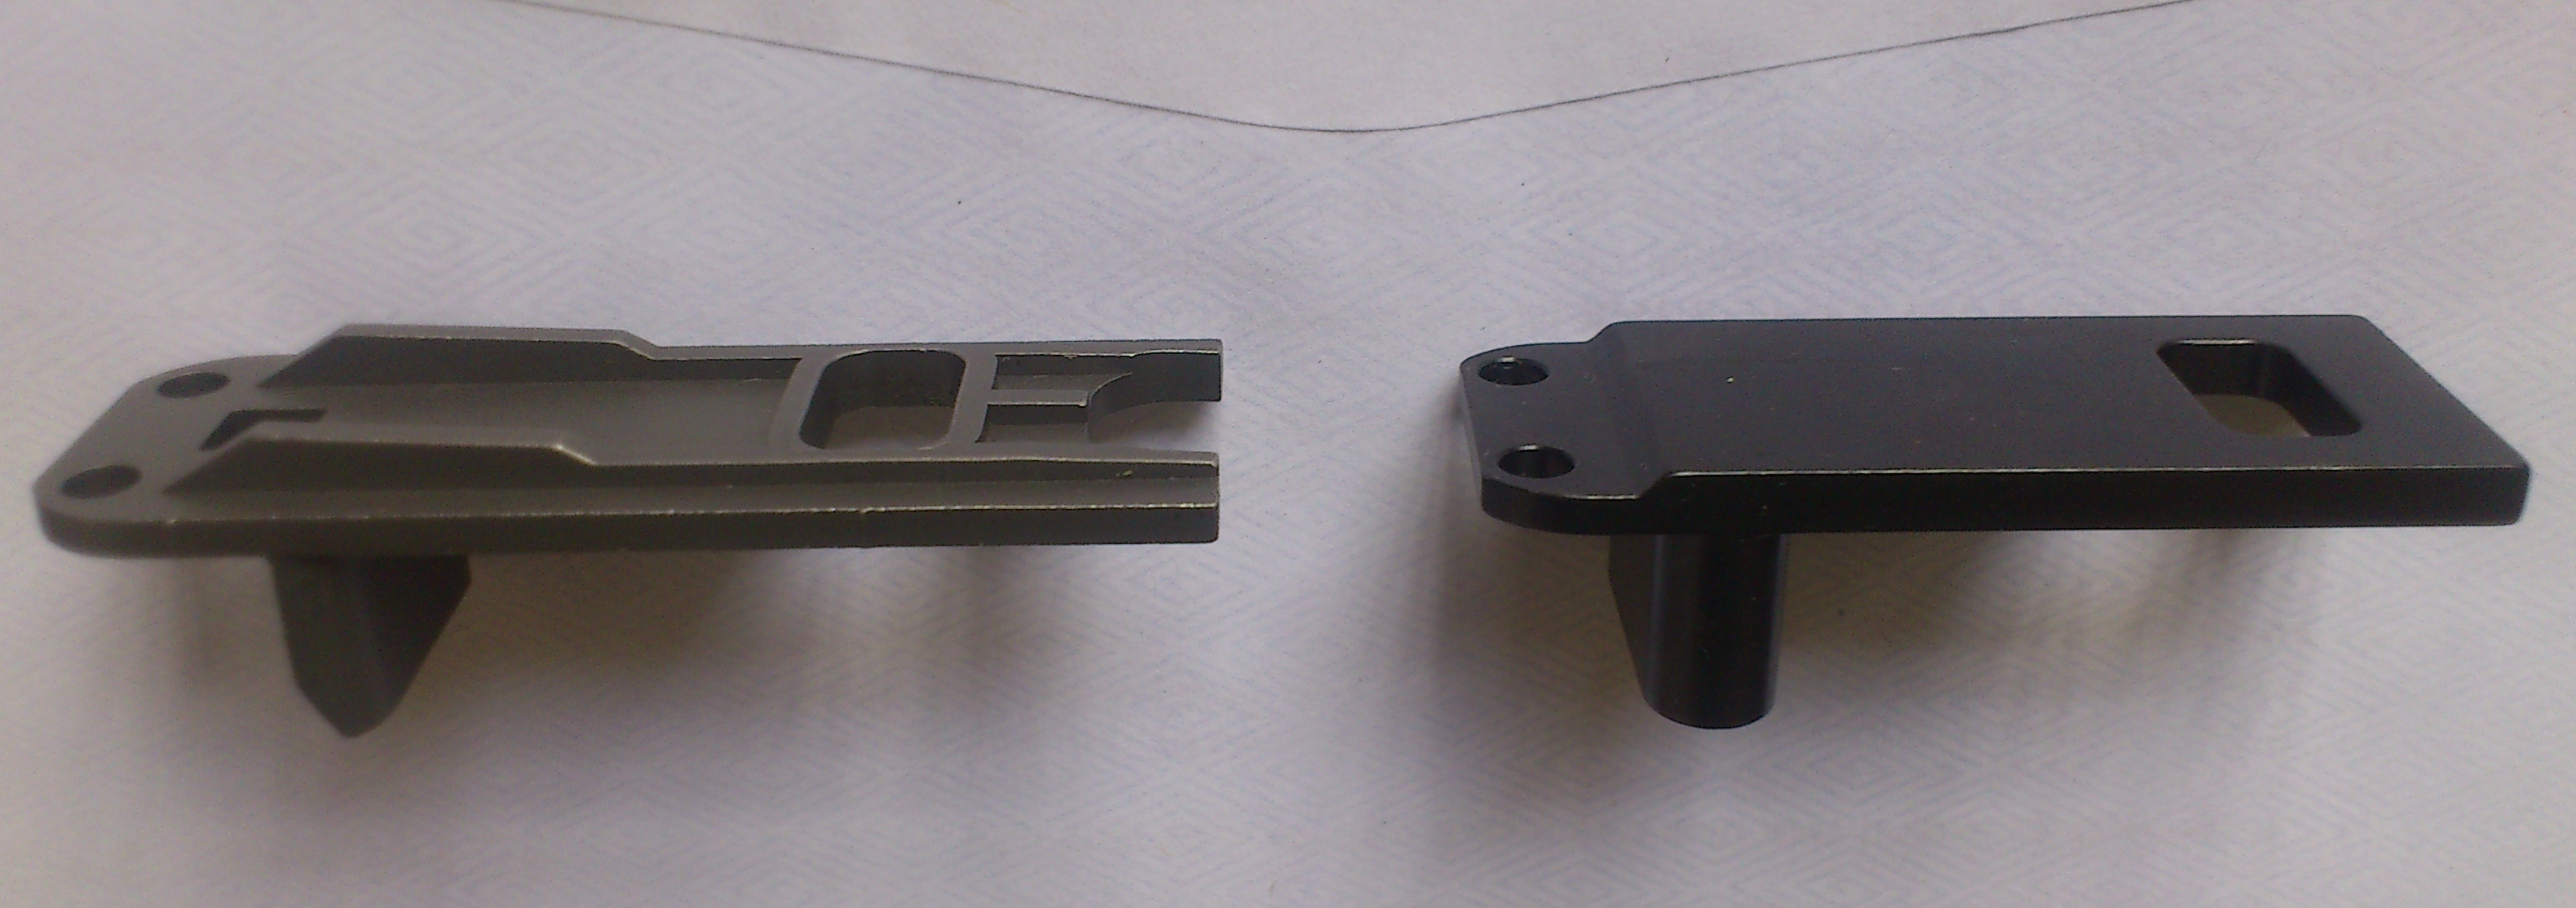
First thing's first: I replaced the front recoil plate with the new/old design. I say "new/old" because I have seen this recoil plate on both new and old original Sako 85s, but somewhere in the middle they changed the design and then went back. The dimensions that count (thickness, width, screw hole placement etc) are exactly the same. They are also the same (interchangeable) throughout the Sako 85 range, from XS to S, SM, M and L actions.
- Recoil.jpg (1.14 MiB) Viewed 12627 times
Original recoil plate left, and the new one I bought from Beretta right.
- RecoilNew.jpg (774.61 KiB) Viewed 12627 times
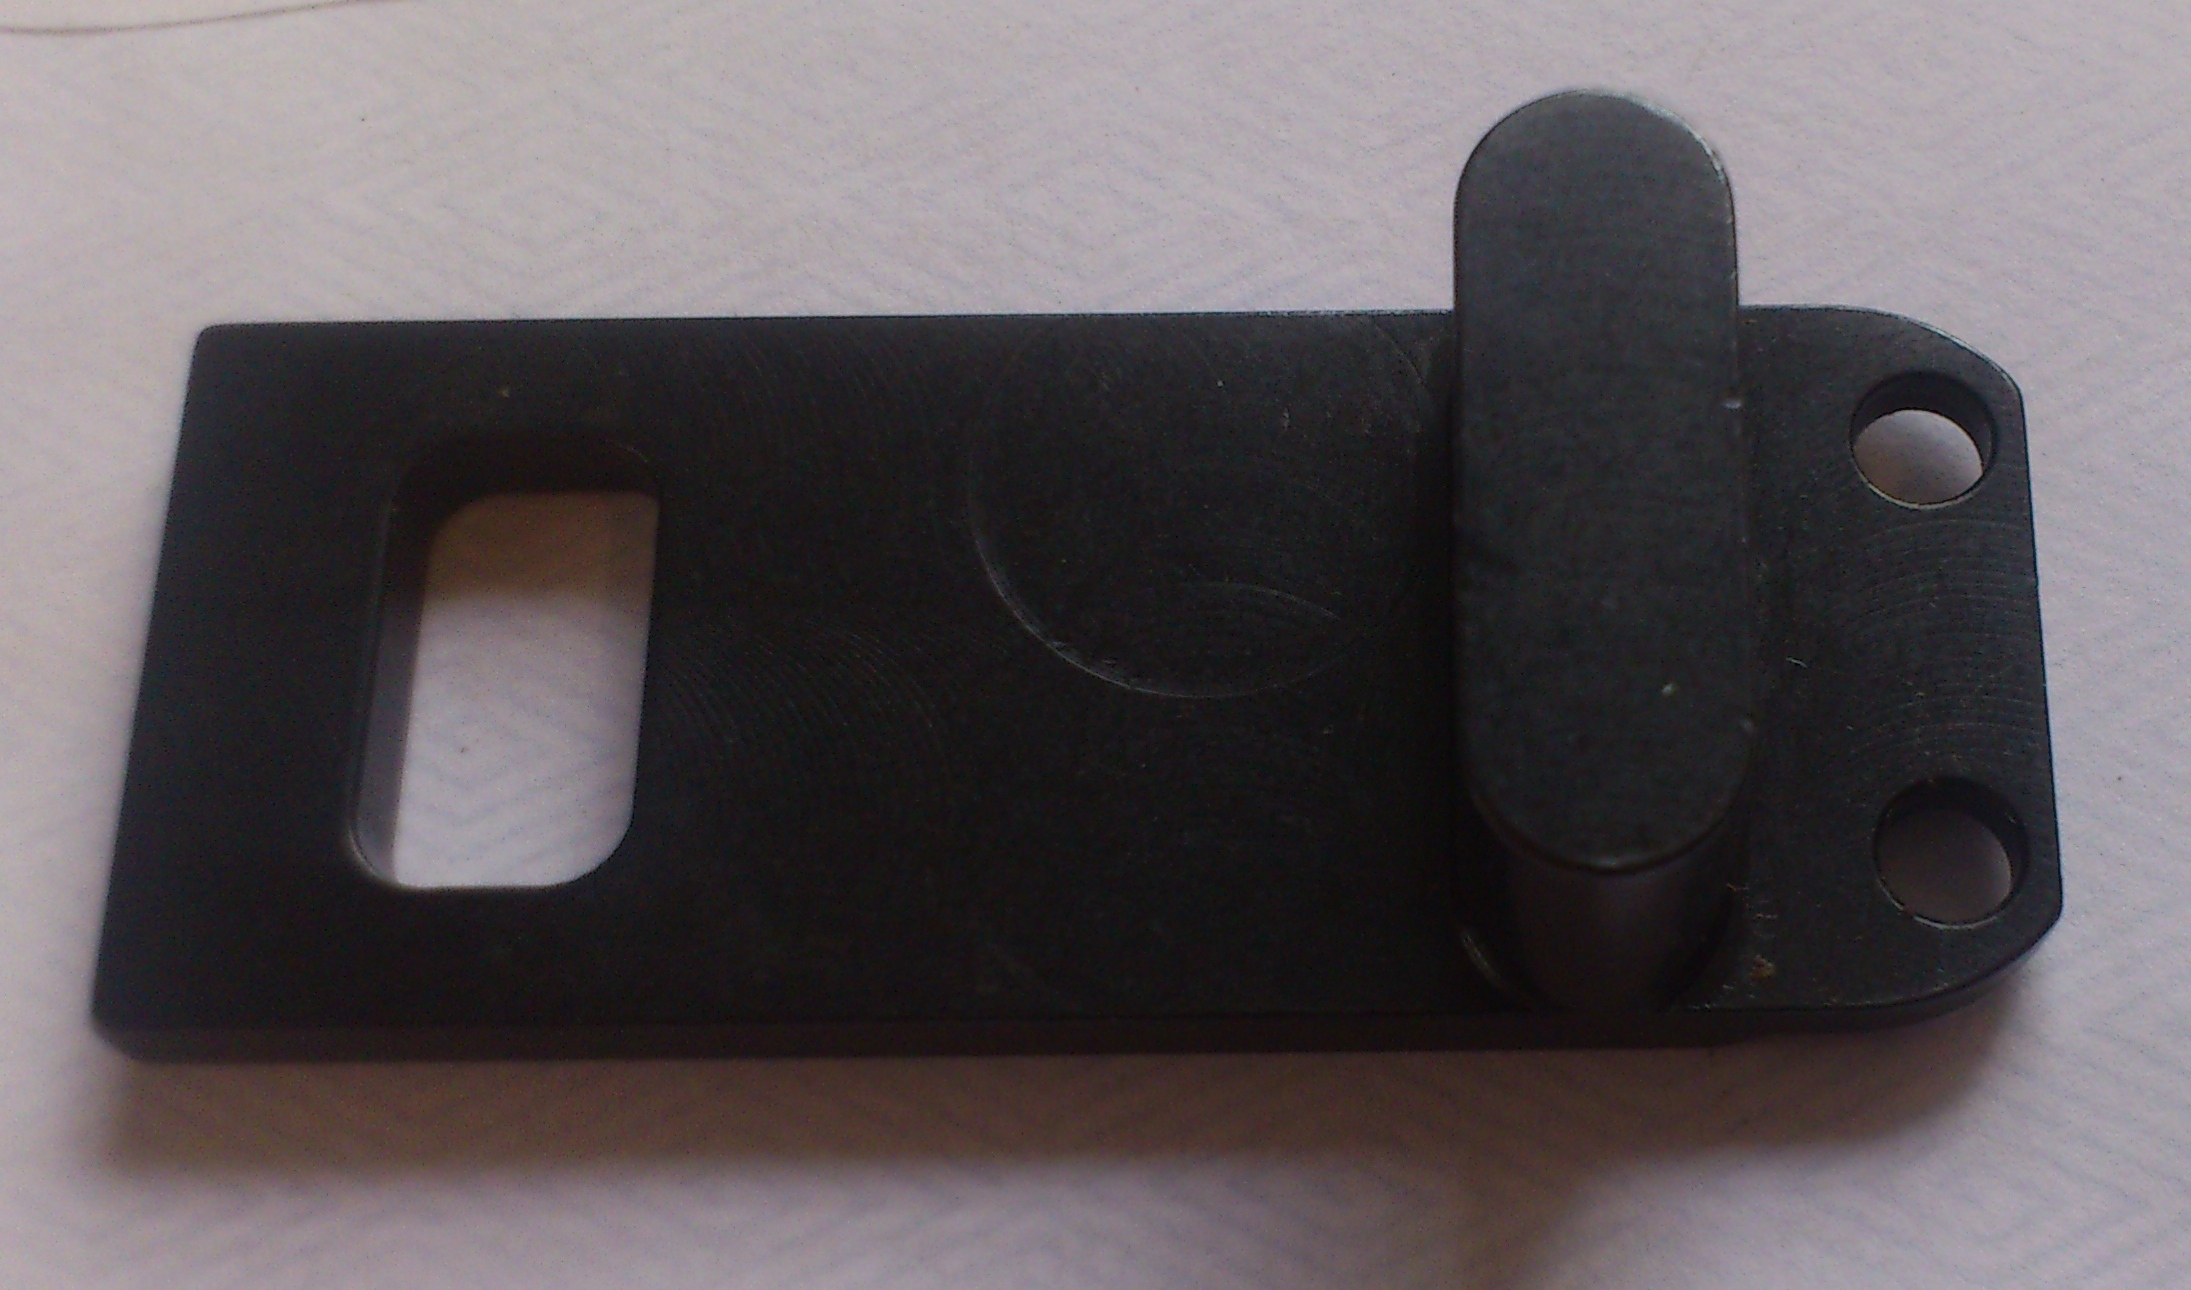
New recoil plate
- RecoilOld.jpg (862.92 KiB) Viewed 12627 times
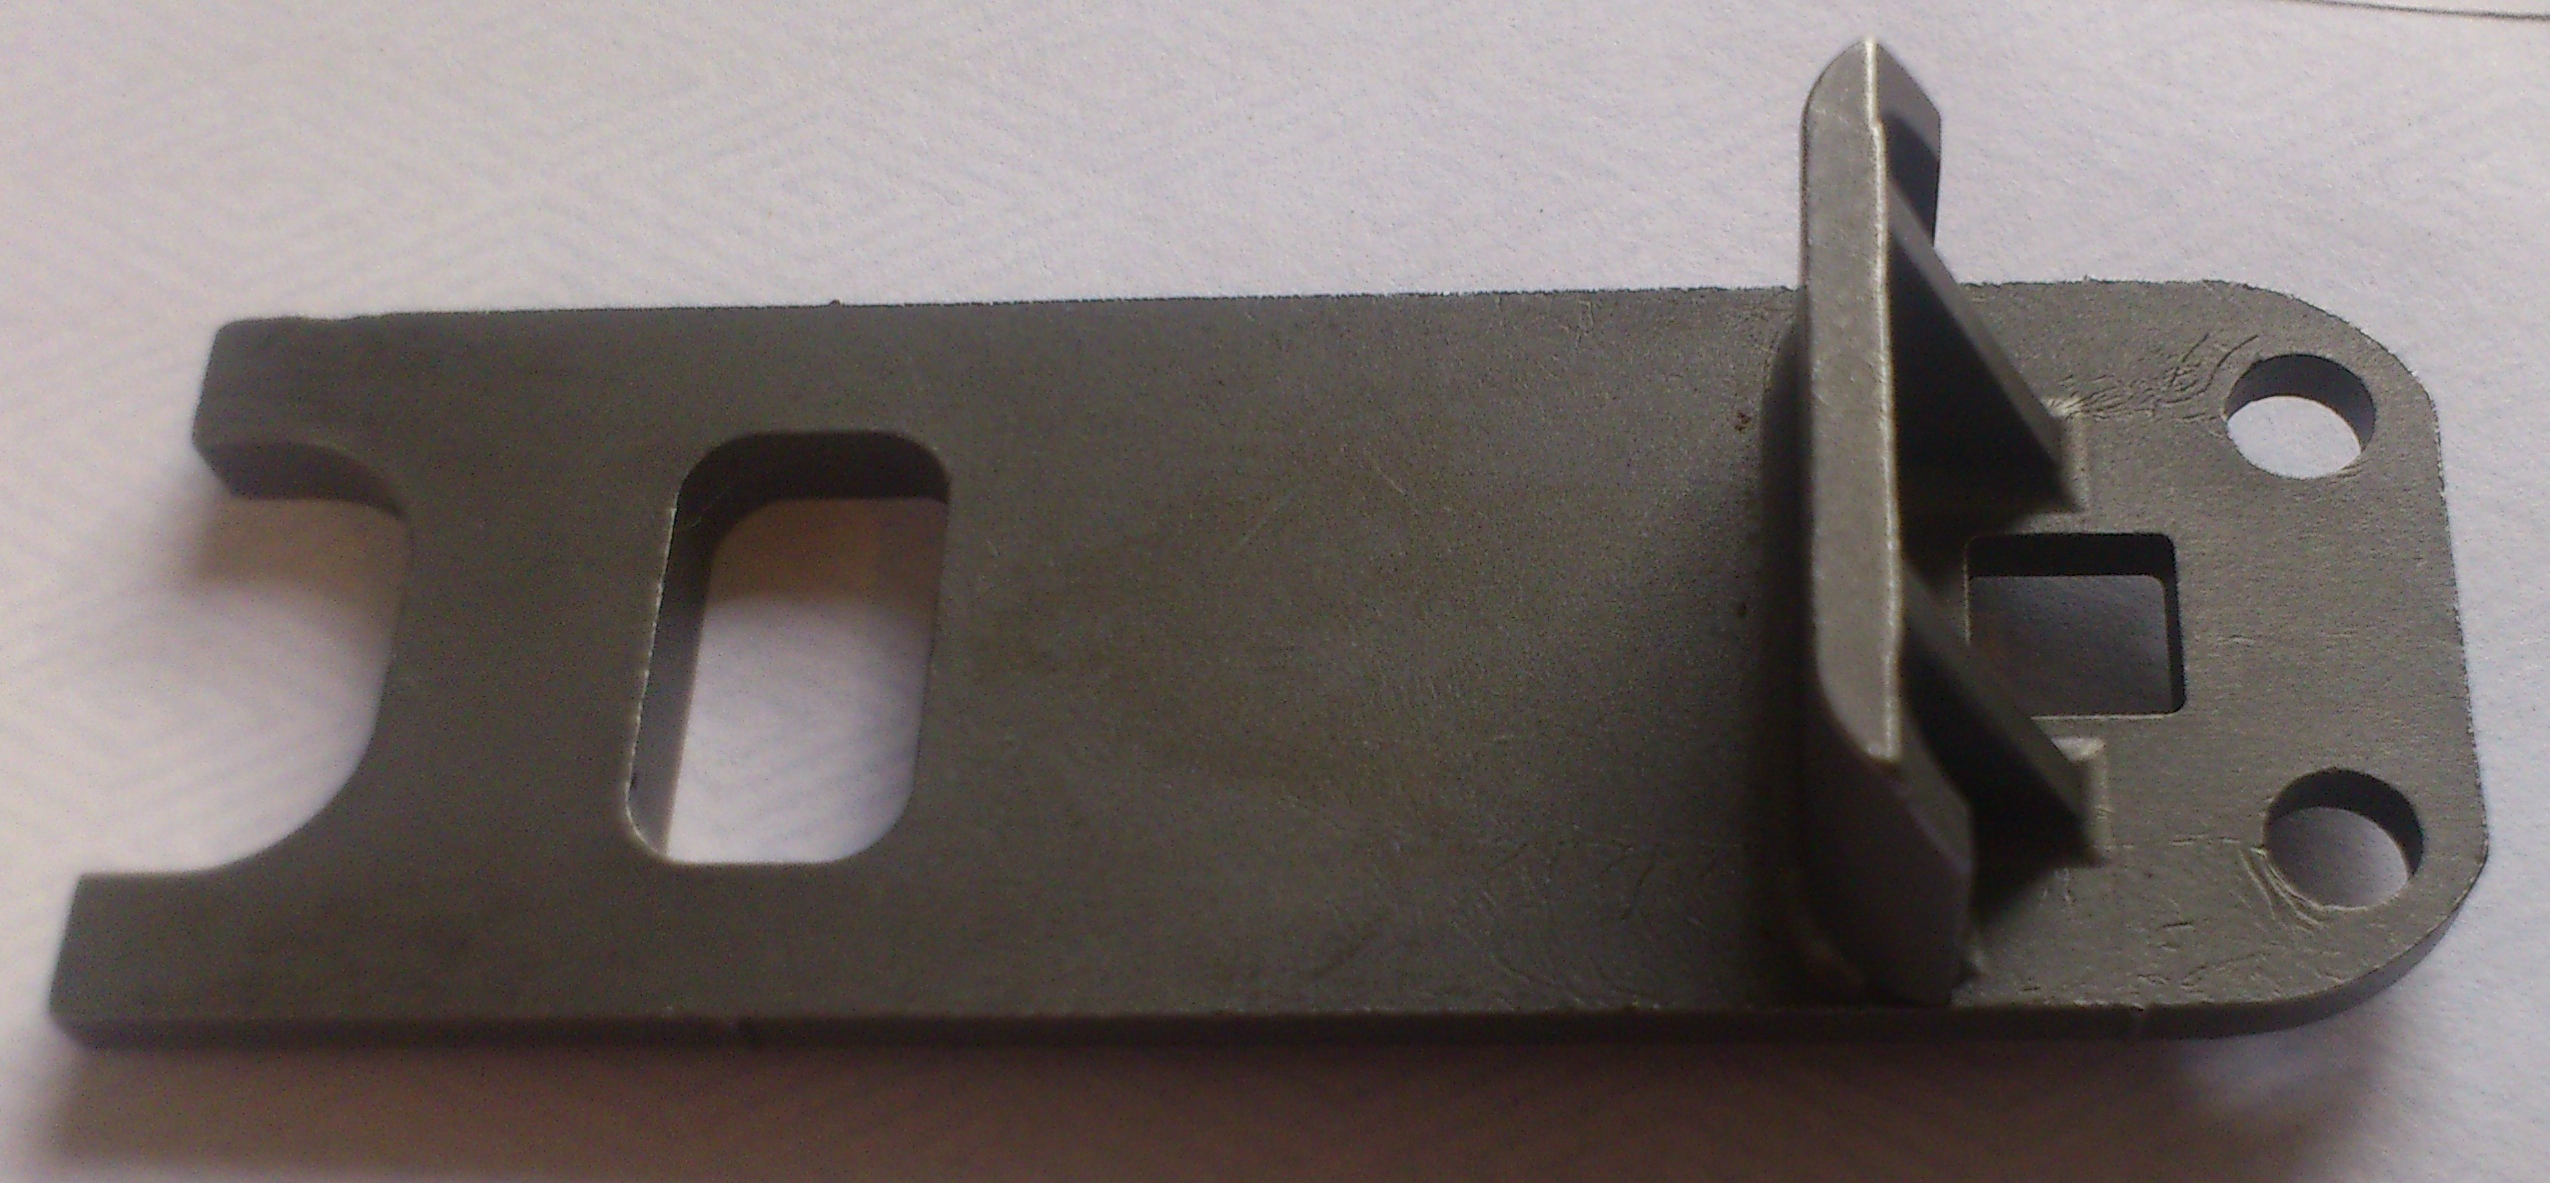
Old recoil plate
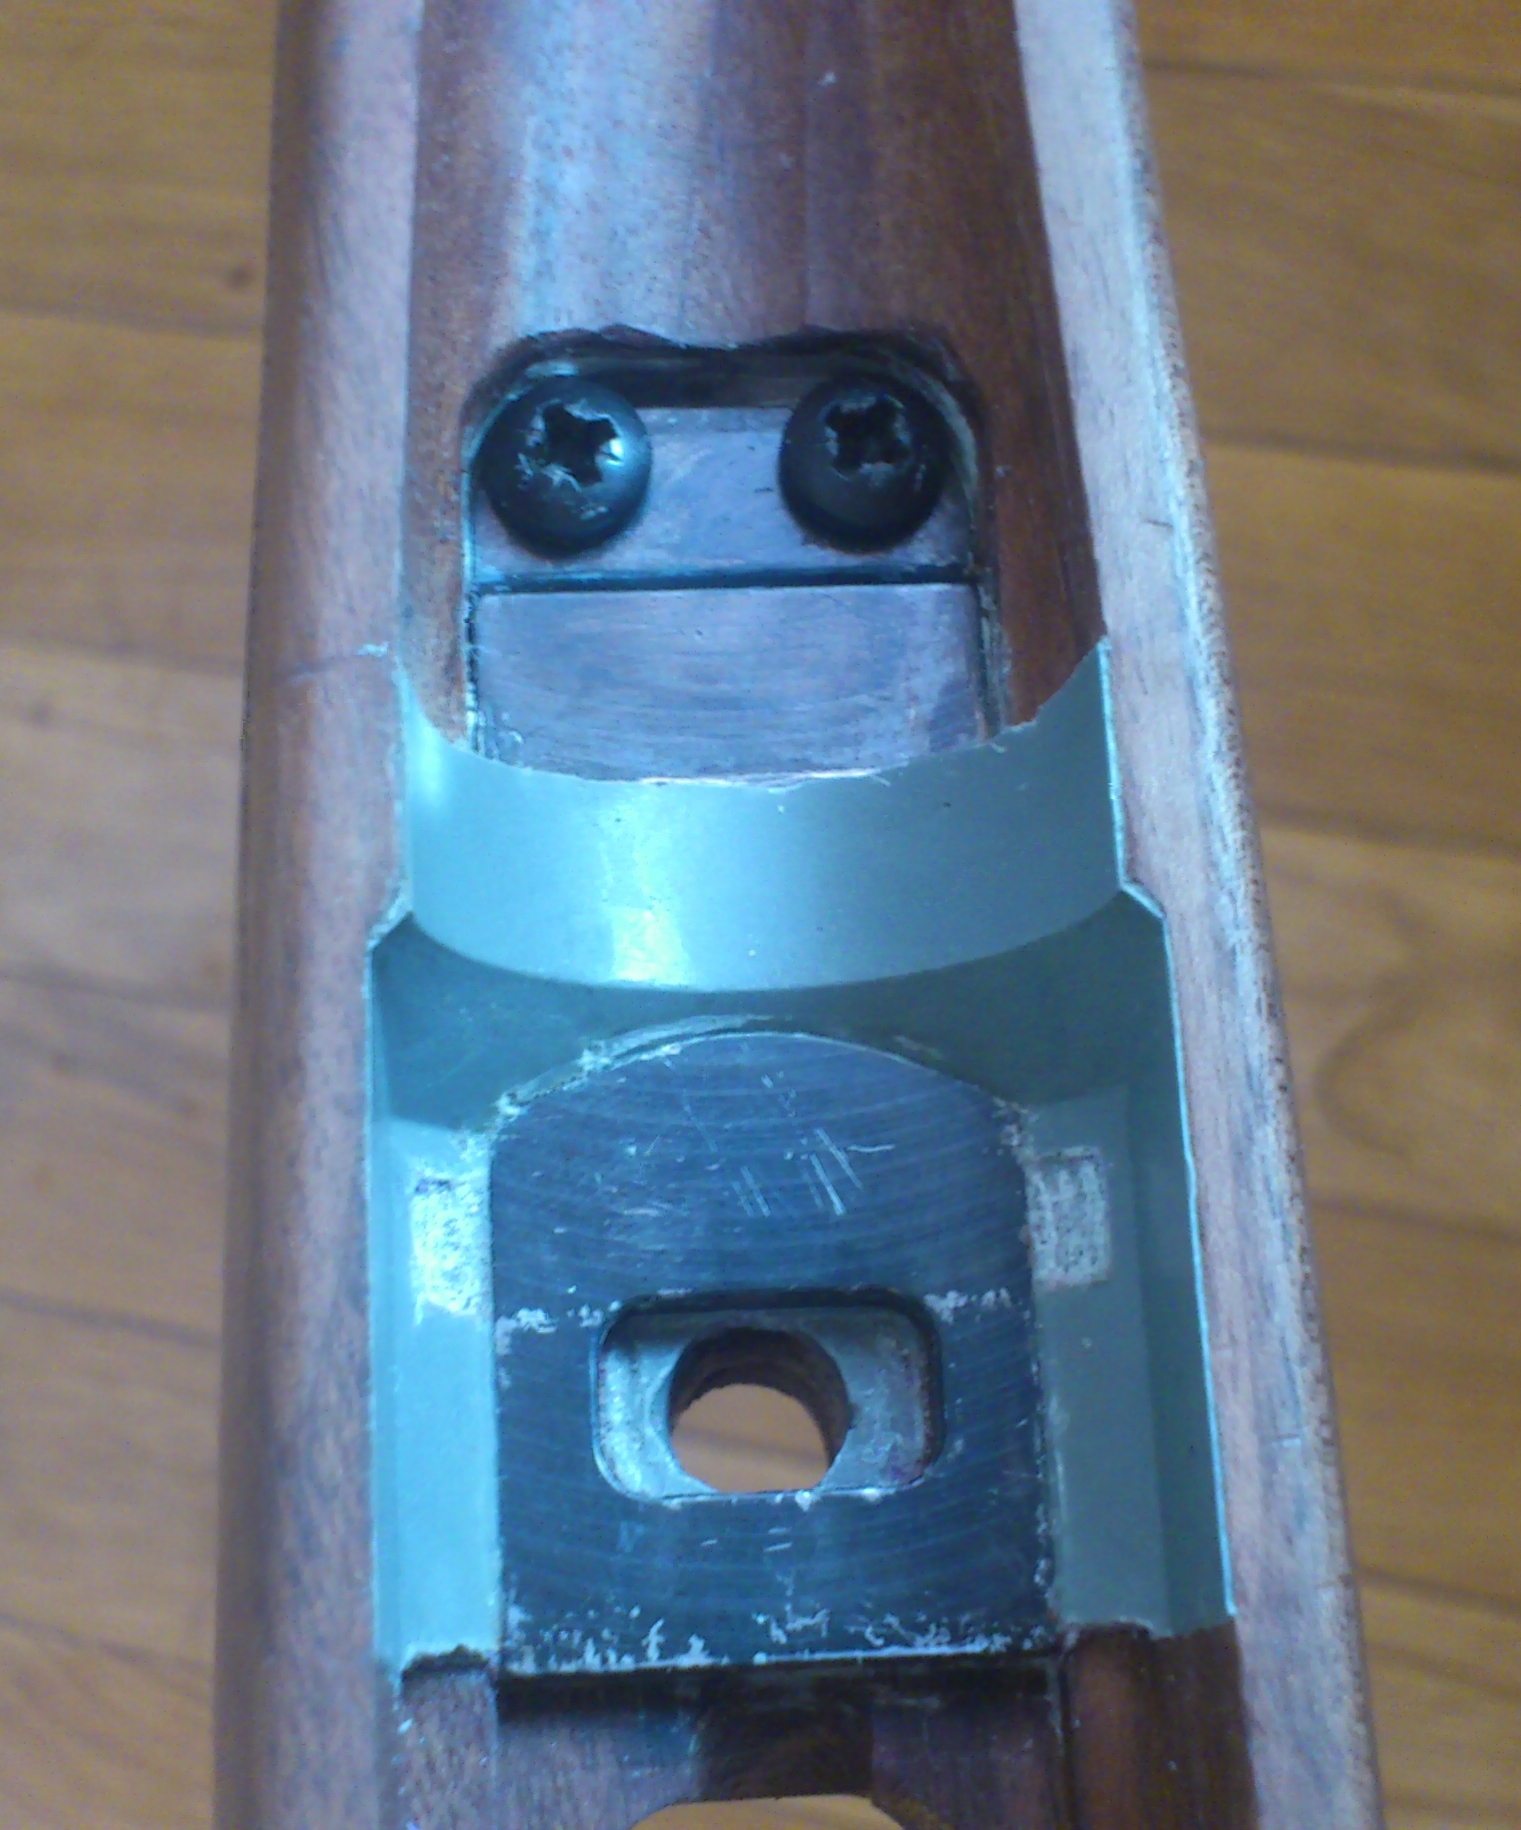
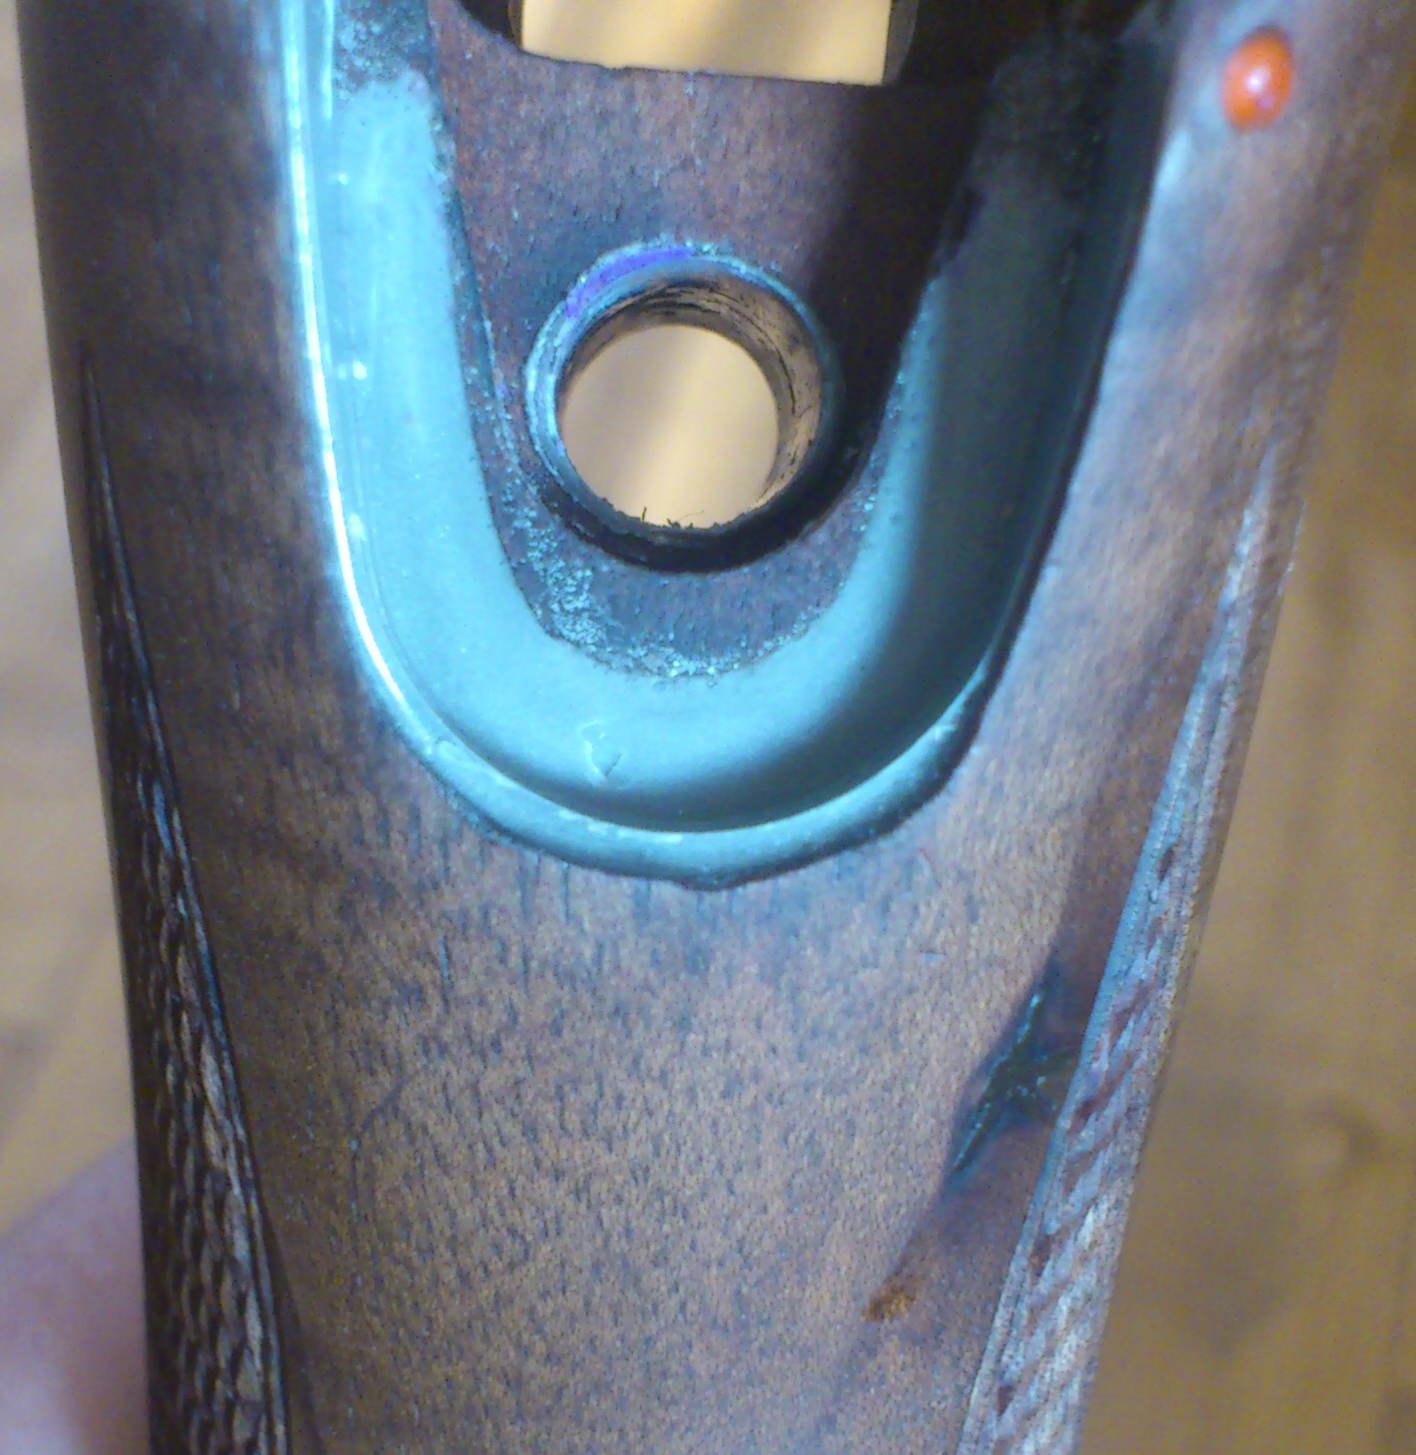
I then set about bedding the rifle. First, I bedded the recoil plate into the stock so that it was level and would not move in the channel. I used masking tape on three sides of the receiver lug - front and sides - that fits into the square hole at the rear of the recoil plate so that the rifle action sat level, with the rear of the receiver lug making contact with the recoil plate. I used masking tape around the barrel to centre it in the channel, then tipped the rifle on its stock and tapped it on the ground to settle recoil plate, lug and receiver at their rear-most point to ensure proper battery. I then torqued the rifle down so the action screws were nipped up front and back.
After bedding the recoil plate, I then bedded the action and rear tang. I also redrilled the rear action screw hole and centred it in the stock using 8mm tube and bedding compound.
- Bedding.jpg (960.29 KiB) Viewed 12627 times
You can see where I have bedded over the recoil plate. My main concern with this is that the recoil plate is made of steel and the bedding compound is mostly aluminium (Devcon). If the steel expands when it heats up, there is the possibility it could rise and dislodge the bedding compound. However, after shooting the rifle and pulling the action out of the stock when hot, I've discovered the recoil plate does not heat up much and so far there are no signs of disturbance.
I also plugged the action with plasticine where the old floating recoil lug would have gone (same as the Sako 75s and Tikkas). You can see a couple of rough patches either side of the bedding compound where I have plugged the gap.
Yes, I have a plan "B". If the bedding compound is compromised in any way, I will simply remove it from the recoil plate and leave the remainder attached to the stock (the bits on either side) to keep the action centred. The recoil plate is where the action beds to the bottom of the rifle - the bedding compound along each side of the inner stock simply keeps it centred during assembly and battery.
- Tang.jpg (683.44 KiB) Viewed 12627 times
I only bedded under the rear tang, and not the lower level (I can always do this later). Like the recoil plate, I left some wood untouched as a guide, then removed some wood around it with the Dremel and bedded the bottom, sides and rear of the tang. After bedding, I clearanced a very small amount of bedding compound around the very rear of the tang to prevent the tang hitting it under battery and chipping the wooden stock. I needn't have bothered, as I discovered the action is now rock-solidly bedded in the stock and does not move at all when the action screws are tightened and loosened.
So, did this make any difference to the way my rifle shot?
No. And yes.
My first five shots were all over the place. The bedding had made absolutely no difference at all. I was dumbfounded! So I tried my old trick again, and put the stainless steel pillar back in the rear of the rifle and tightened both front and rear screws to 6nm.
- Vmax.jpg (785.42 KiB) Viewed 12627 times
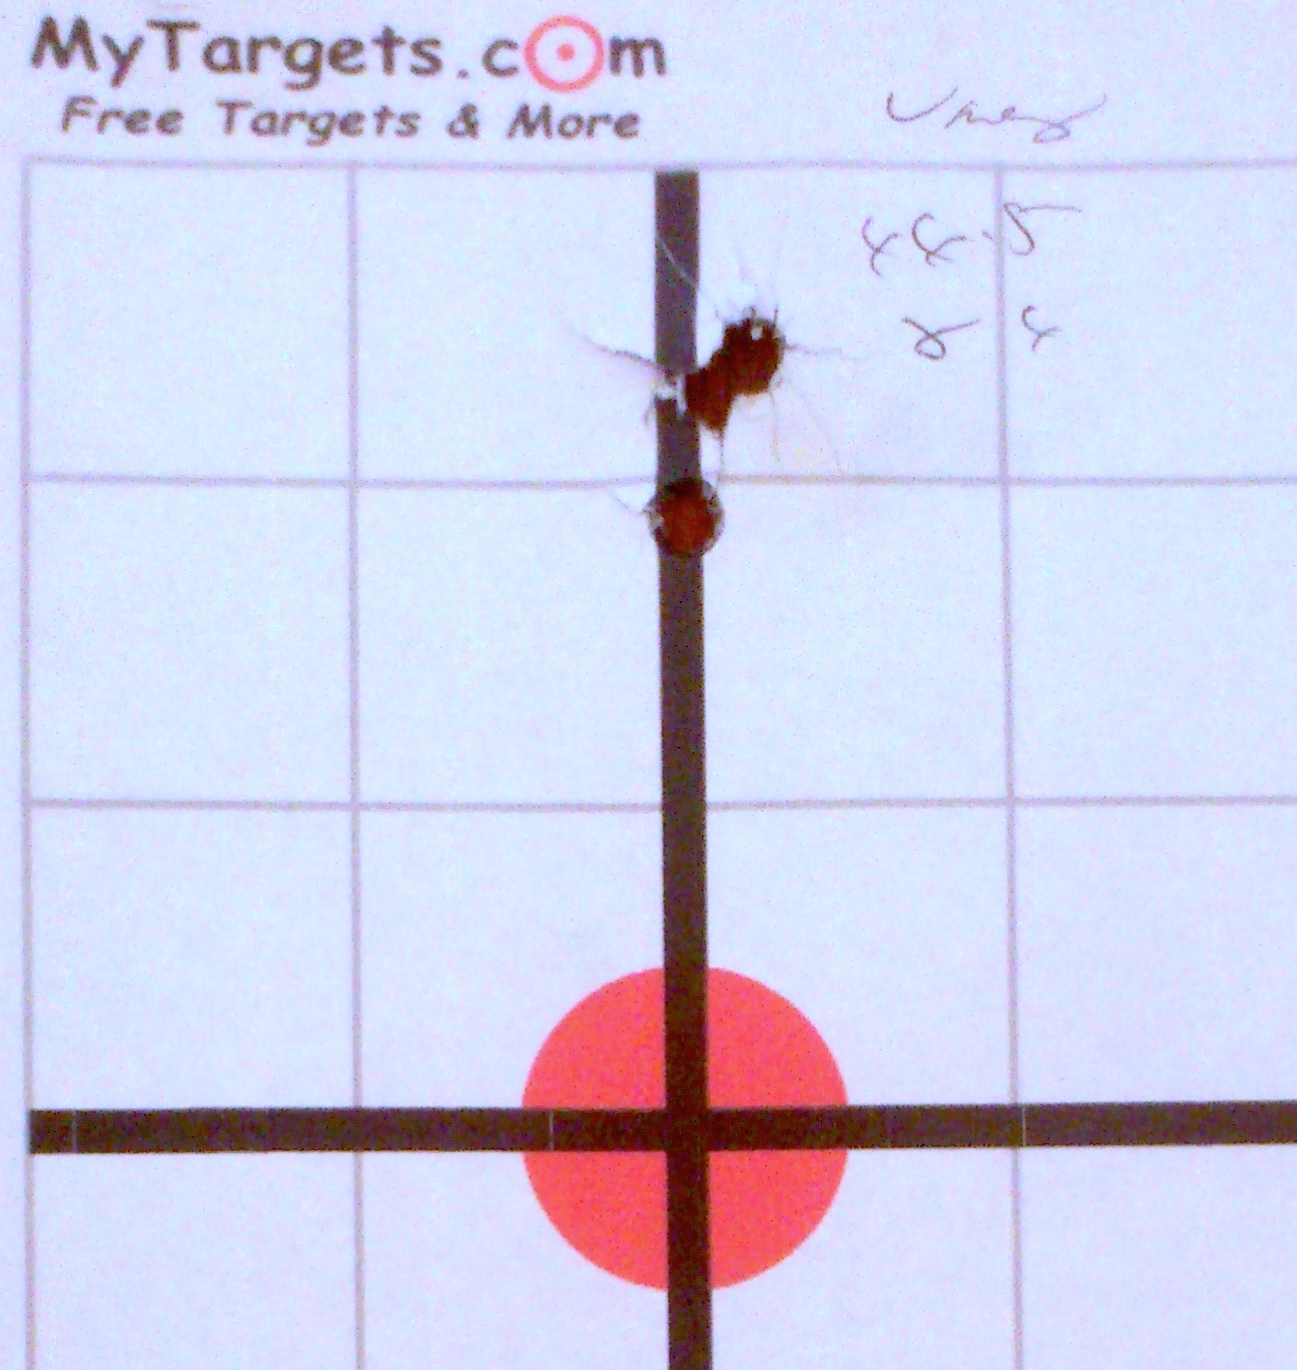
I could not believe it. The first shot went 1/4" low at 100m. The next two shots went into the same hole, just above. I loaded a fourth round and it, too, went into the same hole. That's a .150" three-shot group opening to .400" with the first shot. This is the best group I have shot so far with the rifle, and the bedding does seem to have worked. It certainly hasn't hurt. This was with my 87gr V-max load of 44.5gr of 2209 chronoed at about 3300fps.
- VmaxGroup.jpg (1.57 MiB) Viewed 12627 times
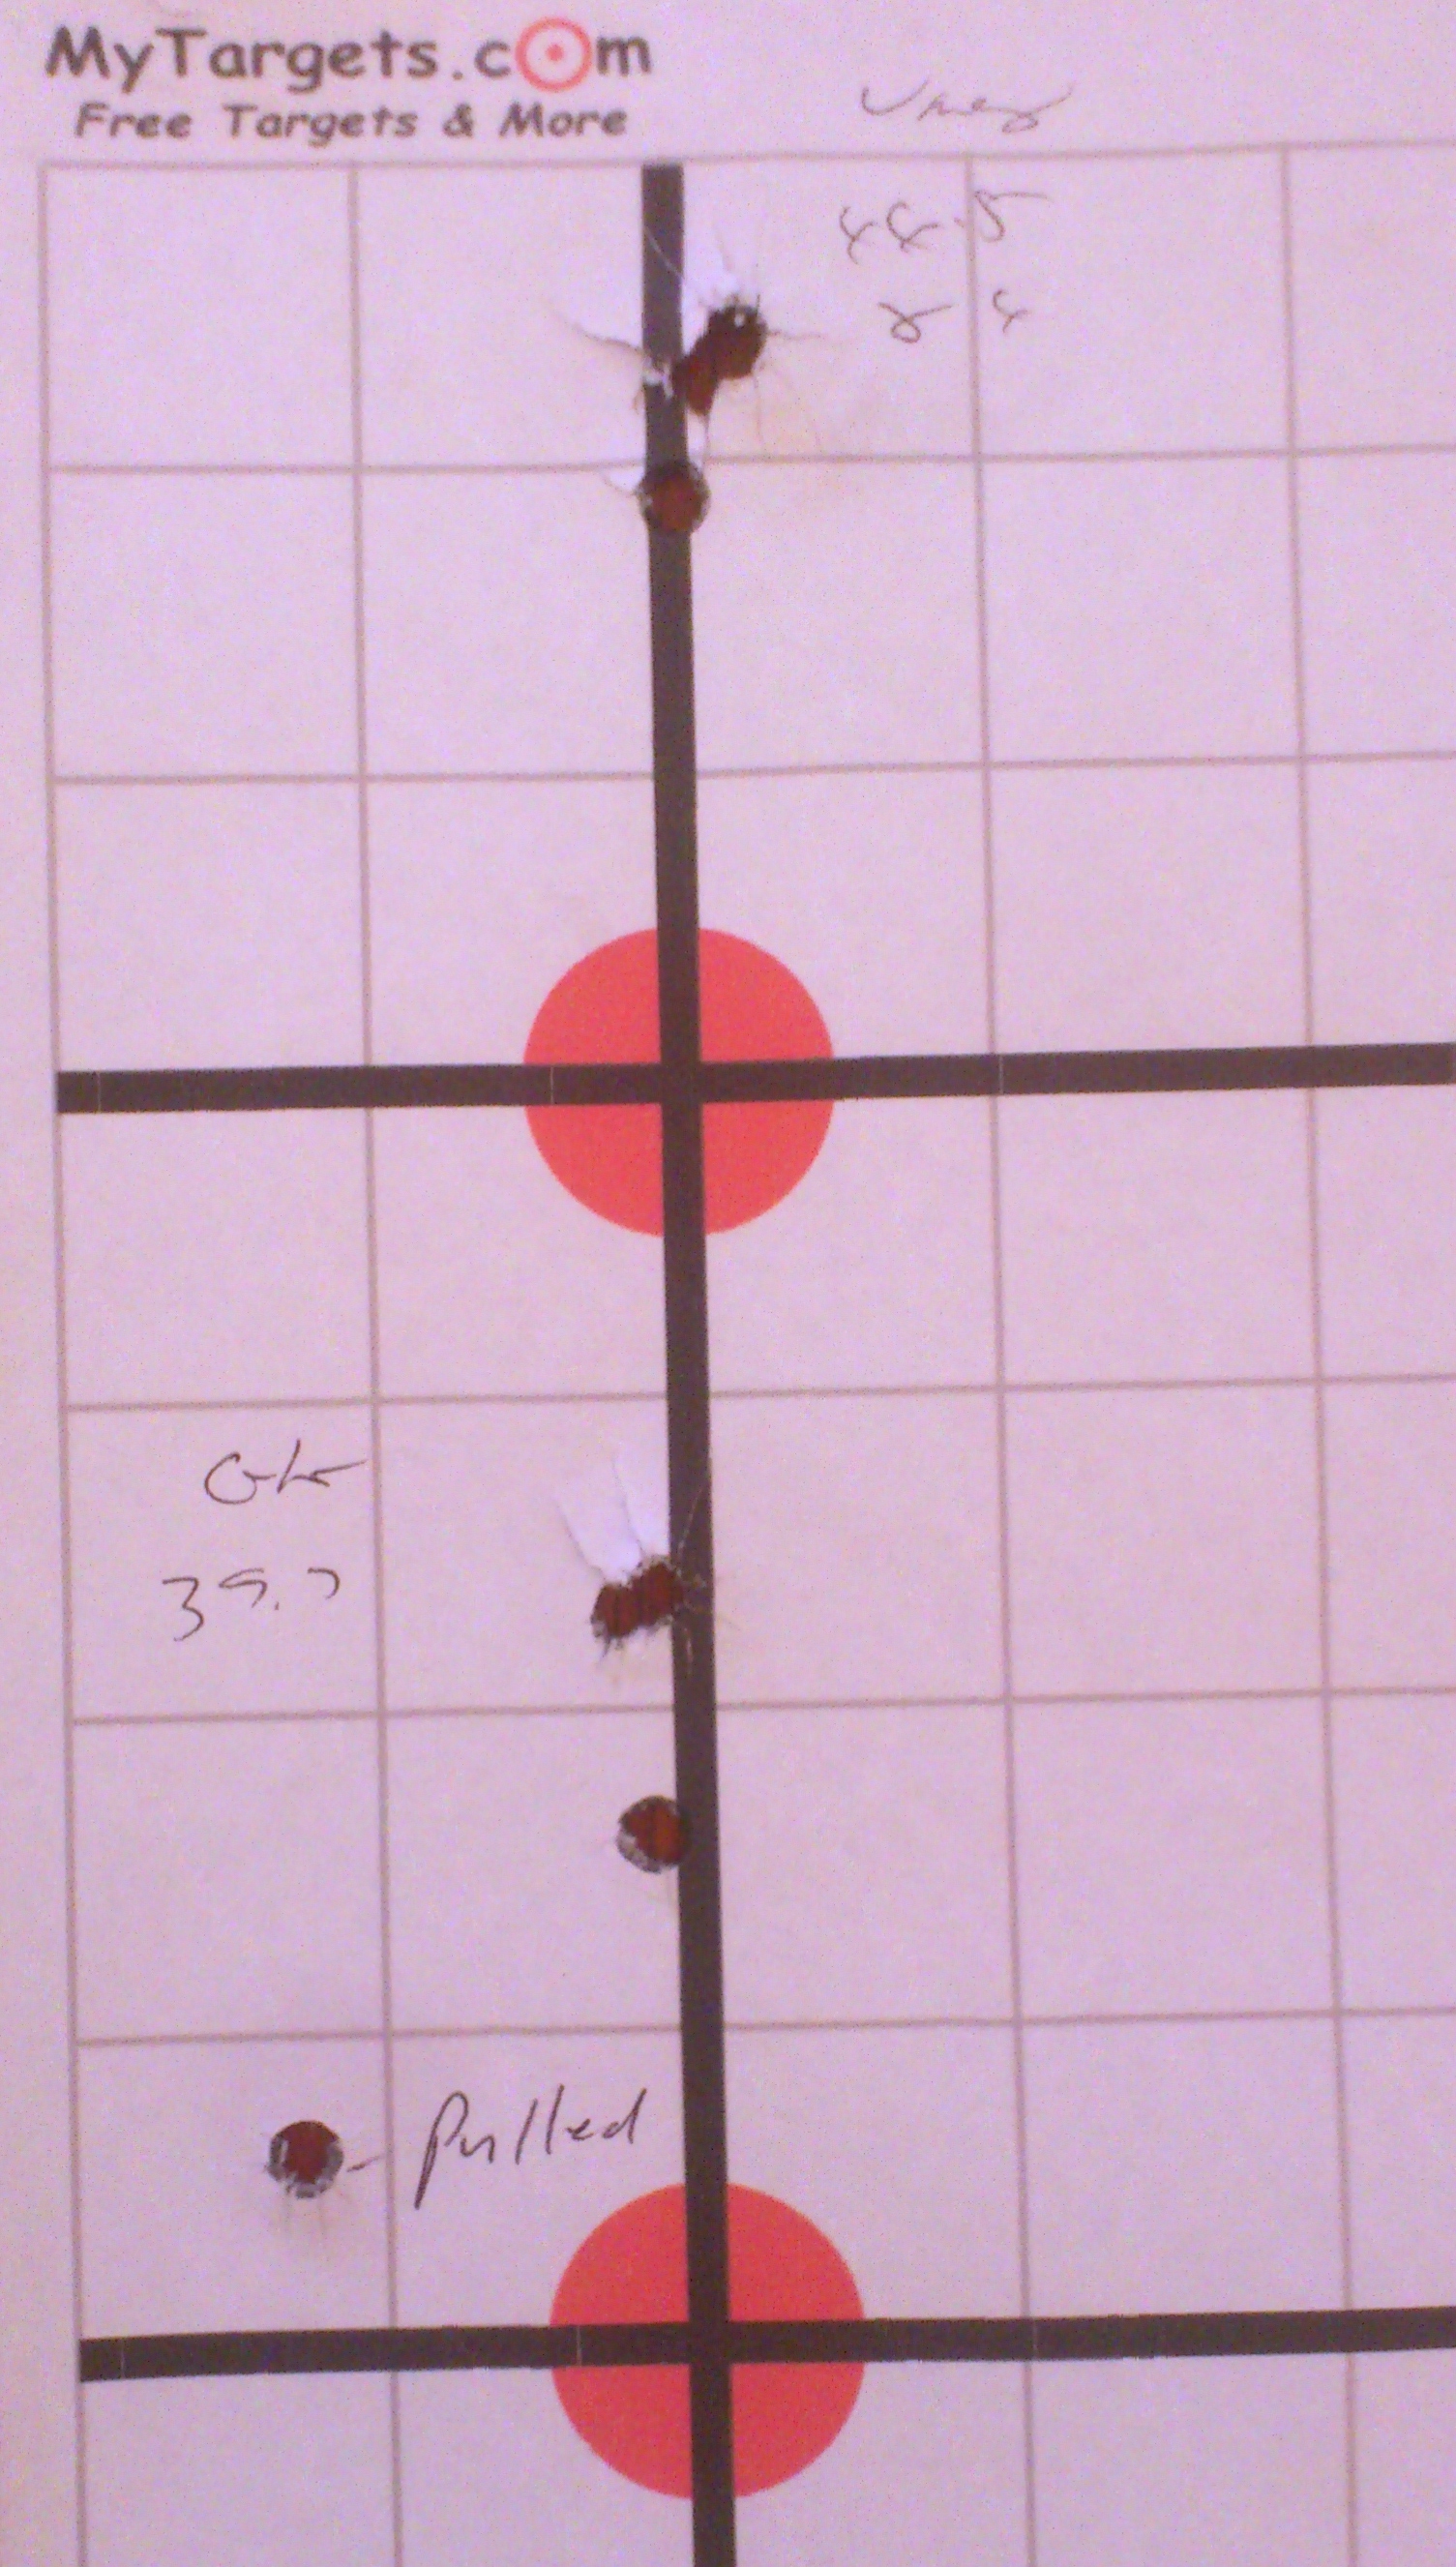
So I pulled out another accuracy round, 100gr Game Kings with 39.5gr of 2209 at about 3000fps. The first shot was pulled after the guy next to me let off his 243 just as I pulled the trigger and jumped out of my seat. The next two shots went into the same place as the Vmax (almost the same hole). The third shot was a little lower. Everything seems OK . . .
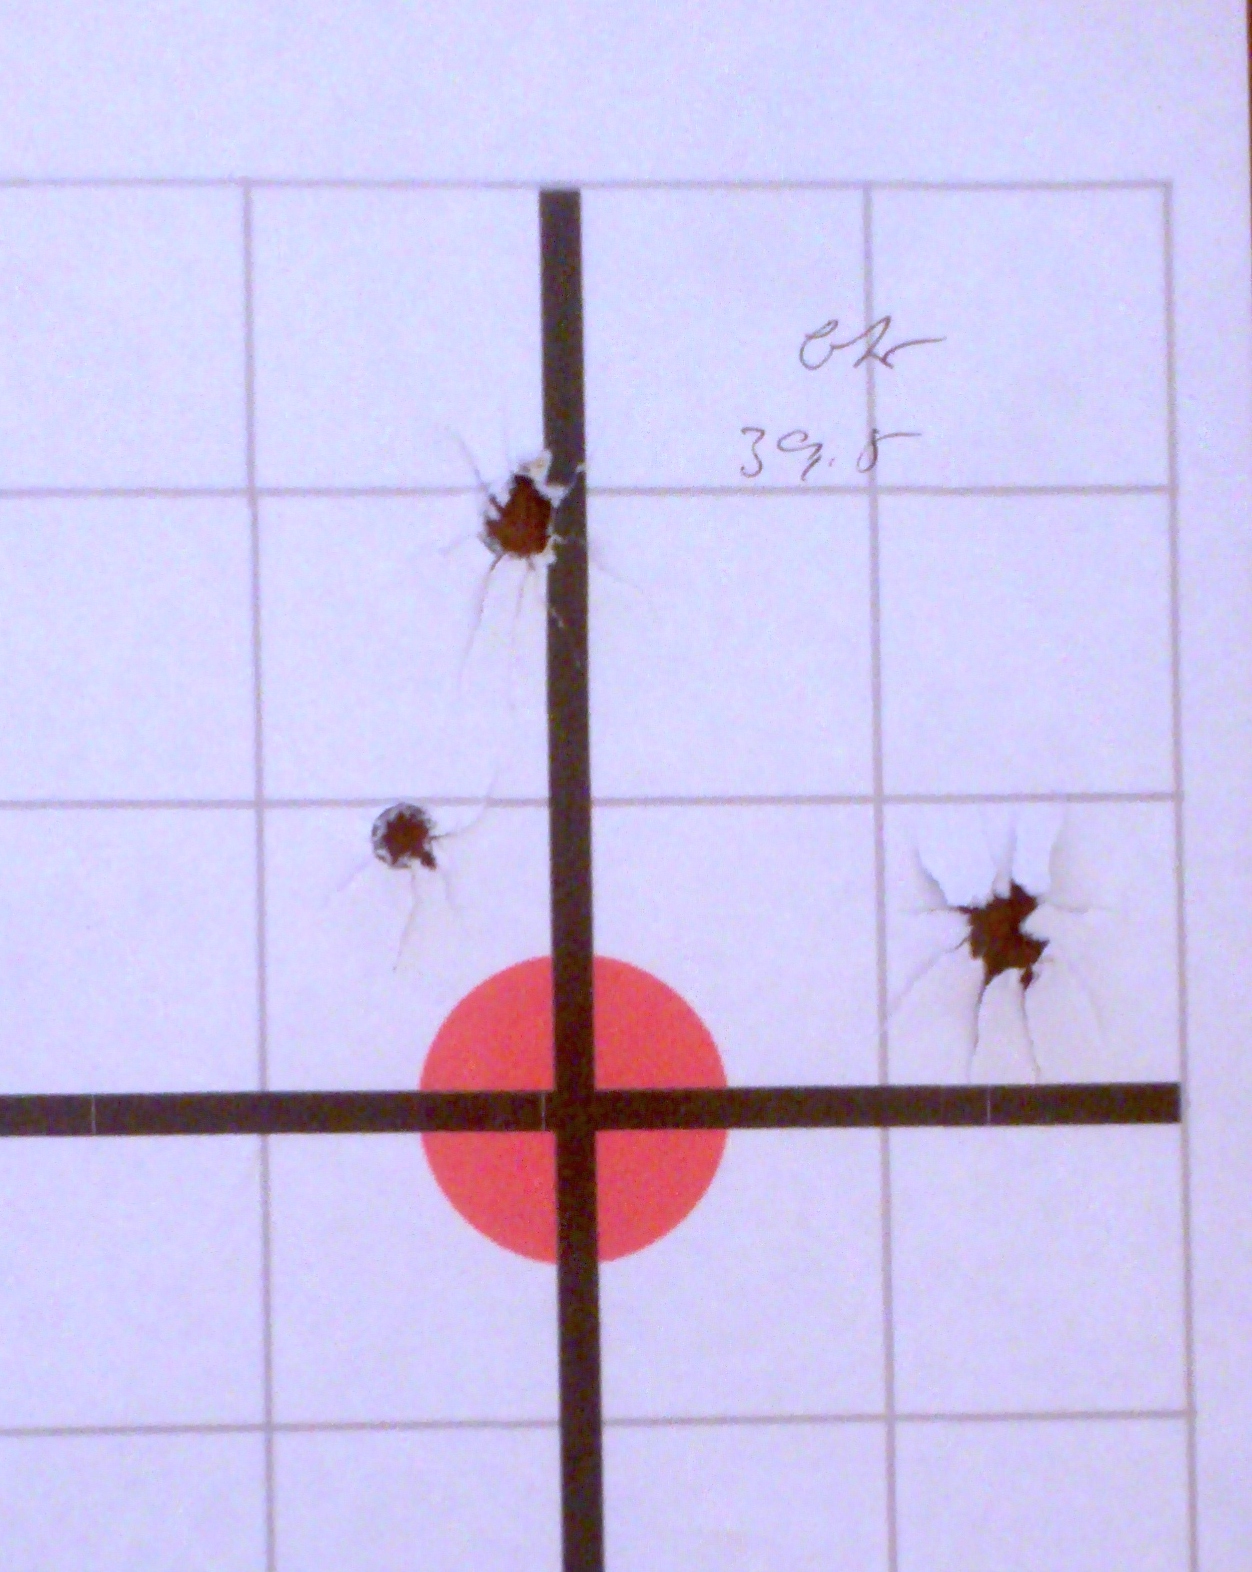
- GameKing.jpg (734.05 KiB) Viewed 12627 times
The next group is when things started to fall apart. Two shots into the same hole 2" above the target - same as the others, then two very wayward shots low and left-right.
Just out of curiosity, I got my torque wrench out and put it on the rear action screw - it was loose.
I have noticed that each time I shoot the rifle without the steel pillar, it's all over the place. As soon as I put the pillar in and torque it down, the rifle shoots dead-straight. I was seeing a pattern developing . . .
When I first got the rifle, it shot really well. But then I noticed the action rattling around in the stock. When I pulled the action screws out, I found remnants of thread locker on the action screws and thought nothing of it. This oversight is what has probably cause me all my grief.
What I have learned in all this is that the stainless steel pillar not only helps stabilise the rear of the rifle, but it allows me to torque the rifle up tight without putting too much pressure on the wooden stock. Without the pillar, the rear action does not like to be too tight in the stock (the more you tighten it, the more groups spread). However, with the correct torque - and no locking compound on the threads - the screw simply works its way loose after a few shots and shoots like a pig. With the steel pillar in, you can tighten it with the correct tension on the stock, but it also stays in place longer (but eventually it, too, vibrates loose).
So what to do? I just bought some Loctite

The next stage may be to bed the stainless steel pillar into the stock and simply leave it there and Loctite the action screws into place and be done with it.
If my rifle shoots consistently after all that, I will have reached a number of conclusions:
1) The Sako 85 bedding system works well - when it works
2) Bedding a Sako 85 does not seem to hurt it, and may even improve it marginally
3) So far, bedding over the recoil plate (as long as the recoil plate is bedded first) seems to be OK
4) Sako 85s do not like a lot of tension (screw torque) on the rear action!
5) For reason 4, pillar bedding is a good idea
6) Thread locker!
I may need to examine the threads on my action screws and the action itself to determine if they are flawed, but considering the whole thing is only held in by a few threads anyway, thread locker (Loctite) simply makes sense.
I hope others can learn from my mistakes and that this has all not been a terrible waste of time! I will report back with more results in due course.
The laws of physics do not apply to politics.