Boyds stock
-

Kipper - Lance Corporal

- Posts: 106
- Australian Capital Territory
Re: boyds stock
![]() by » 07 Jan 2014, 11:30 am
by » 07 Jan 2014, 11:30 am
-

Blackened - Moderator
- New South Wales
Re: boyds stock
![]() by » 07 Jan 2014, 11:32 am
by » 07 Jan 2014, 11:32 am
Norton wrote:I'd been keen to see your process
This.
-

Vati - Corporal

- Posts: 426
- New South Wales
Re: boyds stock
![]() by » 07 Jan 2014, 3:24 pm
by » 07 Jan 2014, 3:24 pm
Boyds Stock for a Lithgow / Slazenger Model 12
This project started as a way to encourage my kids and Mrs into the sport of silhouette shooting that I had just started. I had inherited a very good condition model 12 from my father (his brother had it from new and hardly used it) and from everything I read, I thought that this would make a good starting rifle. The Model 12’s are robust and have a reputation for accuracy but the timber stocks tend to look a little dated and plain (see photo).
- original.jpg (127.36 KiB) Viewed 11426 times
The idea was that I could give myself a project in updating the look of the rifle (without stuffing up the old stock or modifying the action) and making a rifle for the rest of the family to use at the club. Realising that I would most likely need to do the inletting of the stock, I searched the Boyds site for a suitable “cool” looking uninletted stock and settled on the Blaster in Nutmeg.
Stock ordered on line direct from Boyds for $54 USD plus postage ($61 USD) and it arrived in under 2 weeks to my home in Perth.
Now I had to figure out how to do the inletting without spending huge sums on bits n pieces. The investigation process was as follows:
1. Pull apart the Lithgow and measure all dimensions in and around the stock, barrel and action.
2. Lay the Lithgow stock beside the Boyds and let them “talk to me” to see how things would fit
- side by side.jpg (219.88 KiB) Viewed 11426 times
3. Identify what I would need to purchase equipment wise to do the work
4. Plan and design suitable clamping system for working on the stock (again without spending huge amounts of $)
End of part 1
- DaleH
- Lance Corporal
- Posts: 152
- Western Australia
Re: boyds stock
![]() by » 07 Jan 2014, 3:32 pm
by » 07 Jan 2014, 3:32 pm
Item 1 was completed without any issue
Item 2 worked out OK (see photo) in part 1
Side by side view of Lithgow stock (bottom) and Boyds stock (with initial mark up lines) in routing table
Item 3 was simple – I need a core box routing bit of a diameter less than the minimum barrel diameter (18mm at the end of the stock) but large enough so that there was not too much stepping of the router cut for the barrel inlet. This was sorted with the purchase of a $15 13 mm core box router bit from Bunning’s.
Item 4 was of interest and also the largest amount of preparation work that I needed to undertake. Initial plans were to use my BnD workmate as a router table to clamp the stock in place with guides in place to limit the movement of the router. This was soon knocked down as I discovered that there is a slight taper in the Boyds stock width front to rear – Not an issue if I only applied pressure from the router in one direction but if I was heavy handed or routing in both directions, there is the strong possibility that I would force the stock out of the workmate and damage the area I was working on. The idea formed to make a reverse routing table where the job (stock) was fixed in a table surface and the router moved about on top – with the router movement constrained by fences clamped in the right positions.
I set to making this table with the concept being that the stock would be clamped in place using simple soft wood wedges. I had some 12 mm ply that I cut up to make the table and so that I didn’t need extra-long shank router bits, the table needed to have a recess to seat the stock in so that the stock surface was only a few mm below the table surface. The recess also had the advantage of helping to hold the stock in place laterally during the routing process. Below are photos showing the development of the table, the recess and finally the stock in place. The action area of this stock has a “kick” of ~ 10mm to suit the receiver of the Ruger 10/22 that it is more commonly sold for. This got in the way of the recess so a full penetration and wider cut out needed to be made in the table to allow for this (more on this latter). Also, as I wanted to retain as much meat on the table for strength purposes, I made it longer than the stock at the front and rear – this then required a cut out for the high cheek rest of the stock.
- router table underside.jpg (190.11 KiB) Viewed 11426 times
Underside of router table top showing routed recess for stock and mark out for the routing penetration
- router table.jpg (127.19 KiB) Viewed 11426 times
Completed router table with all cut outs – table was ~ 600mm long and 500 mm wide
- stock in table rear.jpg (179.69 KiB) Viewed 11426 times
Stock mounted in table – note soft pine wedges under the but piece
- stock in table nose.jpg (195.29 KiB) Viewed 11426 times
Front of router table with stock clamped in place with timber wedges.
- DaleH
- Lance Corporal
- Posts: 152
- Western Australia
Re: boyds stock
![]() by » 07 Jan 2014, 3:40 pm
by » 07 Jan 2014, 3:40 pm
Measure twice (or three or four times) cut once.
I started the mark up process by laying the action on the stock and trying to get a good position for the trigger relative to the hand grip on the stock. Once done, the position of the rear of the action was marked on the stock, the trigger assembly removed and the barrel and receiver laid on the stock to allow me to mark the position of the hold down bolt (simple on the Lithgow as there is only one bolt).
I set out the original stock inlet dimensions on the new stock once I had established the correct centre line of the new stock and the hold down bolt position. This proved a little problematic as due to the previously mentioned taper in the stock and the combination of work light, stock colour and marking pencil colour made things a little difficult to see. For the set out of the centre line I used a compass and normal wood marking gauge. I also made sure that I marked the barrel inlet depth and radius on the front of the stock so that I could keep track of the starting router depth throughout the rest of the process.
- action n stock.jpg (173.39 KiB) Viewed 11373 times
The first move from here was to select an appropriately sized bit ( I was intent on using the original hold down bolt for this) and drill the hold for the hold down bolt right through the stock. I made sure this went slowly as it was to pass right through the stock and I didn’t want to splinter the underside when the bit exited with stock – sharp bits are essential! It is important that the drill was kept square to the top surface of the stock – a drill press would have been ideal but I got by using a level and a square. Once this pilot hole was through an appropriately sized blade bit was used to drill the hole to accept the hold down lug on the barrel to a depth measured off the original stock.
- hold down hole.jpg (182.9 KiB) Viewed 11373 times
Now the big work started.
As the barrel has a taper, the inletting must also taper both from side to side and in depth. So that this taper could be easily achieved, I released the wedges on the barrel end of the stock and inserted a 1mm packer on each side of the stock and then reclamped the stock with the wedges. The 1 mm is the approximate difference in depth from the front of the stock to the start of the action inletting in the stock ( 2mm barrel diameter difference). This was much easier than routing a constant depth inlet for the barrel and then having to remove the extra by hand.
I set out router guides on either side of the stock to keep the router along the centre line of the stock while I cut the barrel inlet to the full centreline depth in several passes.
- router 1.jpg (199.6 KiB) Viewed 11373 times
Set up for routing – note the “high tech” guides. Initial plan was to screw timber guides in place. Much easier to clamp levels which definitely have a straight edge
I identified an issue with the previously mentioned kick in the rear of the stock breach area. This protruded too far upwards and limited the travel and depth of cut of the router. As this was an aesthetic only feature, the application of an electric plane to this area eliminated the issue for good.
- hump be gone.jpg (150.94 KiB) Viewed 11373 times
Hump be gone
Once the initial full depth cut was made, the router depth of cut was reduced, the guides moved outwards and the routing to the edge of the marked up area was gradually made. It is important to note here something that I should have done (my old wood work teacher would have kicked me severely before this point in time). The pencil lines were too thick for work such as this and I should have used a finer pencil to start with and then completed the final mark up with a marking knife. Not only would this have given me a finer line to work to – therefore a more accurate cut out – but would also have limited any potential splintering at the edges of the cut.
The rear of the action of the Lithgow is quite simple so I decided to continue through to the end of the inlet area at the width of the receiver (the receive stepped out by a couple of mm so this was routed at that width – similar to what is done on the original Lithgow stock).
I finished the routing as close to the lines as I was comfortable in going and then removed the stock from the table and clamped it in the workmate for dremel (cutting bit and sanding drums)and sandpaper work. This got me to a position where I had the barrel and receiver fitted into the stock.
- action in stock.jpg (163.03 KiB) Viewed 11373 times
Barrel and receiver fitted into stock – so far so good – some gaps but sorted out later.
- DaleH
- Lance Corporal
- Posts: 152
- Western Australia
Re: boyds stock
![]() by » 07 Jan 2014, 3:50 pm
by » 07 Jan 2014, 3:50 pm
Inletting of the action was to follow with initial mark up and then numerous test fitting and dremel work following the initial cut in with the router. This was not the neatest bit of work but as I intend to bed the action (after the initial test firing) then the messy bits will be taken care of.
A lot of this work was done on the workmate following the initial routing cuts on the router table.
- action inlet.jpg (180.12 KiB) Viewed 11447 times
For the final penetrations for the trigger and magazine, holes were drilled on the corners of each marked up opening and the material cut out with a hand held coping saw. This was required due to the limitations in depth of cut of my router. The penetrations were then cleaned up with the dremel and a hand file.
Once this was done, the action needed to be fitted into the stock to allow for the safety catch operation and a cut out for the action bolt. This was done with a combination of the dremel and a saw.
- bolt in place.jpg (202.77 KiB) Viewed 11447 times
As can be seen in this photo, the trigger doesn’t stick out very far and therefore some timber needed top be removed for the stock to allow for this. I identified this as a potential issue when I first recrived the stock as the stock ws much deeper than the original lithgow (but still within Silhouette stock regulations)and the hand grip seemed a little short). The stock was marked up and several cross cuts were made and the remaining material chisled out and the area cleaned up with a rasp, shaping file and scraper blade.
- area to be removed.jpg (110.71 KiB) Viewed 11447 times
Area to be removed from stock for trigger and magazine areas.
- nearly there.jpg (127.03 KiB) Viewed 11447 times
Nearly finished aside from trigger guard and applying the finish
The original trigger guard and magazine floor plat would not fit this stock due to the radical differences in stock designs. As metal working facilities were limited (hacksaw, files and dremel) I decided to work with aluminium as this is relatively soft, easily cut, shaped and formed.
I found a nice extruded section of heat soak from a plasma TV that my son was pulling apart for electronic components and I decided that this would make a nice guard – especially as the texture would provide a non-slip surface. The guard was cut and formed first off and then the floor plate was cut as a second piece therefore I could cover all openings in the timber. This was held in place with little timber screws. The image below shows a slightly crooked and rough guard – this was addressed with a subsequent remake and tidying up of the stock prior to inletting the guard and oiling the stock. The guard was painted with a flat black paint to match the dark colour of the barrel, receiver and scope.
- trigger guard.jpg (182.36 KiB) Viewed 11447 times
First fit of guard
The rifle was then assembled for a final once over before it was stripped for painting, sanding and oiling.
- finished before oil 2.jpg (216.5 KiB) Viewed 11447 times
Final assembly before stripping for final finish application
Following sanding to 320 grit and then a 0000 grade steel wool polish, 3-4 coats of Tru-oil stock finish was applied to provide the final finish of the stock.
- finished 2.jpg (227.69 KiB) Viewed 11447 times
Final assembled rifle.
Issues if I do it again
Apart for the time locked away in the garage doing the work, the main issues encountered and to be addressed on the next one are as follows:
1. Improved mark-up practices – use of more contrasting marking pen, finer marking pen and a final mark up using a marking knife
2. The factory finish on the stock was not as good as I had hoped with a couple of places needing more work (not really seen until final inspection). I would spend more time on the coarse sanding
3. Keep all tools sharp – including dermal bits (this is good work shop practice anyway but it is surprising how far you will go with a blunt tool until thinking about changing it)
4. Measure-cut-check-measure-cut-check etc small steps at all stages and if possible get someone else to have a look over it through the process – you may be too close to the work and miss something simple.
Hope this is of interest - happy to answer any questions.
- DaleH
- Lance Corporal
- Posts: 152
- Western Australia
Re: boyds stock
![]() by » 08 Jan 2014, 8:04 am
by » 08 Jan 2014, 8:04 am
I like how you kept the bulk of the foregrip to create a little recess for the magazine to sit behind.
It makes it look much neater.
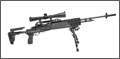
.308 Remington 700 SPS tactical
Leupold VX-3 6.5-20x40mm
-

Techc - Private

- Posts: 93
- South Australia
Re: boyds stock
![]() by » 08 Jan 2014, 9:19 am
by » 08 Jan 2014, 9:19 am
DaleH wrote:2. The factory finish on the stock was not as good as I had hoped with a couple of places needing more work (not really seen until final inspection). I would spend more time on the coarse sanding.
Was the stock sanded/finished at all? or just straight off the router?
Burris Fullfield II 4.5x14-42mm
-

paps - Private
- Posts: 67
- Victoria
Re: boyds stock
![]() by » 08 Jan 2014, 9:38 am
by » 08 Jan 2014, 9:38 am
- DaleH
- Lance Corporal
- Posts: 152
- Western Australia
Re: boyds stock
![]() by » 08 Jan 2014, 2:01 pm
by » 08 Jan 2014, 2:01 pm
Looking good though
-

Bourt - Sergeant

- Posts: 559
- Queensland
Re: boyds stock
![]() by » 08 Jan 2014, 3:43 pm
by » 08 Jan 2014, 3:43 pm
- DaleH
- Lance Corporal
- Posts: 152
- Western Australia
Re: boyds stock
![]() by » 09 Jan 2014, 7:34 am
by » 09 Jan 2014, 7:34 am
DaleH wrote:see how much mess i make what I bed the action - might be left with no option
At least you're giving it a go.
You've gotta start somewhere and you'll make mistakes. But you fix them a move on and you can say you did it all yourself
HOW SPORTER 270 WIN
HOWA YOUTH .204 RUGER
MARLIN 1889 .38-40
-
ebr love - Corporal
- Posts: 306
- New South Wales
Re: boyds stock
![]() by » 06 Feb 2015, 11:18 am
by » 06 Feb 2015, 11:18 am
Member-Deleted wrote:Are they a good quality?
Im from australia and have 2 stocks from boyds and they are excellent.
Also the reason why they are 99 buck is there export laws restrict the sale of stocks internationaly out off the usa to below $100, hence the price of $99 and the cost of delivery is then added after the cost of the stock but not part of the stock price. And they are sort of mass produced to keep the price down ore they wouldnt have an international market .
- terry62
- Recruit

- Posts: 2
- South Australia
Re: Boyds stock
![]() by » 06 Feb 2015, 10:28 pm
by » 06 Feb 2015, 10:28 pm
- terry62
- Recruit
- Posts: 2
- South Australia
Re: Boyds stock
![]() by » 07 Feb 2015, 9:51 am
by » 07 Feb 2015, 9:51 am
-
bigfellascott - Lieutenant General

- Posts: 5289
- -
-

Wes - Corporal
- Posts: 364
- Victoria
Re: Boyds stock
![]() by » 08 Feb 2015, 1:35 pm
by » 08 Feb 2015, 1:35 pm
Wes wrote:About $300 a pop locally aren't they?
Yeah I think they are something like that (I buy mine direct from Boyds) most of em cost around $130 at the time including delivery.
-
bigfellascott - Lieutenant General
- Posts: 5289
- -
Re: Boyds stock
![]() by » 08 Feb 2015, 1:56 pm
by » 08 Feb 2015, 1:56 pm
Rossi M92 44mag
CZ 452 deluxe .22LR
Howa 1500 .204
Savage FVSR 22
-

Combat_Wombat - Corporal
- Posts: 379
- Queensland
Re: Boyds stock
![]() by » 08 Feb 2015, 2:10 pm
by » 08 Feb 2015, 2:10 pm
Combat_Wombat wrote:I bought one directly from Boyds at the end of last year and it ended up being $170 delivered.
Yes the delivery charges have gone up considerably compared to when I bought most of mine. I guess it their way of increasing their margins without increasing the cost of the stock and causing issues re their $99 limit thingy

-
bigfellascott - Lieutenant General
- Posts: 5289
- -
-
Wes - Corporal
- Posts: 364
- Victoria
Re: Boyds stock
![]() by » 10 Feb 2015, 9:32 am
by » 10 Feb 2015, 9:32 am
bigfellascott wrote:I guess it their way of increasing their margins without increasing the cost of the stock and causing issues re their $99 limit thingy
Thank god they have the ITAR restrictions though right?
Think of all the pieces of wood that would be trafficked around the world otherwise
-
Bourt - Sergeant
- Posts: 559
- Queensland
Re: Boyds stock
![]() by » 10 Feb 2015, 6:51 pm
by » 10 Feb 2015, 6:51 pm
- Turtleburp
- Recruit
- Posts: 30
- Victoria
Re: Boyds stock
![]() by » 11 Feb 2015, 1:05 pm
by » 11 Feb 2015, 1:05 pm

Boyds are also $99 - $119 US for their stocks, the MT ones are $299 US says their website
Tikka T3 Varmint Stainless .243 Winchester
R.I.P. M1 Garand .30-06 Springfield
Leupold VX-R 4-12x40
-

BBJ - Corporal
- Posts: 347
- Northern Territory
Re: Boyds stock
![]() by » 20 Jun 2015, 5:29 pm
by » 20 Jun 2015, 5:29 pm
- CatDog
- Recruit
- Posts: 8
- Western Australia
Re: Boyds stock
![]() by » 21 Jun 2015, 1:22 pm
by » 21 Jun 2015, 1:22 pm
Some they can't ship internationally if the value is too high because of the US ITAR export restrictions. But if they can they'll tell you and get your order in
.308 Winchester
-

Seconds - Corporal
- Posts: 357
- New South Wales
Re: Boyds stock
![]() by » 21 Jun 2015, 3:29 pm
by » 21 Jun 2015, 3:29 pm
CatDog wrote:Hello I'm new to enoughgun and am interested in buying a boyds stock for my .223 savage, I have never brought anything from overseas before and would appreciate any information regarding purchasing directly from Boyds, thank you. Great website .
Go to their website and select the rifle brand (Left hand side of the page) then select the stock you want (same area as the rifle brand) you have to keep the price under $99 so don't try and add laser checkering or anything like that.
From memory you will have to join (no big deal, just need your name and address details etc) then its pretty much just a matter of selecting your stock you want, entering your details and credit card details and they will generally send you a email when your order is processed and shipped etc, all mine have taken around 10 days to arrive from the day of order so pretty quick and painless to do.
I use one of those Aus Post pre paid Credit Card type things for all purchases on line (that way no scum bag can tap into it and drain the funds as they have a habit of doing at times (I just load up what I need to buy the products and any delivery costs plus a few bucks for any diff in the Aus/US $$ and any fees etc.
Anyway I hope that all makes sense!
-
bigfellascott - Lieutenant General
- Posts: 5289
- -
Re: Boyds stock
![]() by » 21 Jun 2015, 9:06 pm
by » 21 Jun 2015, 9:06 pm
- CatDog
- Recruit
- Posts: 8
- Western Australia
Re: Boyds stock
![]() by » 22 Jun 2015, 9:07 am
by » 22 Jun 2015, 9:07 am
Boyds priced the stocks so they can send them internationally
-
agentzero - Lance Corporal
- Posts: 183
- Tasmania
Re: Boyds stock
![]() by » 22 Jun 2015, 9:30 am
by » 22 Jun 2015, 9:30 am
They did raise it to $500 for Canada a year or two ago.
I suppose that's faint hope they could increase it for us at some point.
-

Aster - Moderator
- -